I'm home for the Chinese New Year holidays, but I left my yarn in my dorm! I thought I was going to go mad until I went diving into my closet and found a stash of yarn my mom tucked away. (By the way, am I the only person who can't find anything at all in a tidy room?)
I found skeins of sea-foam green yarn, and Miku immediately jumped to mind. Thus began my latest project.
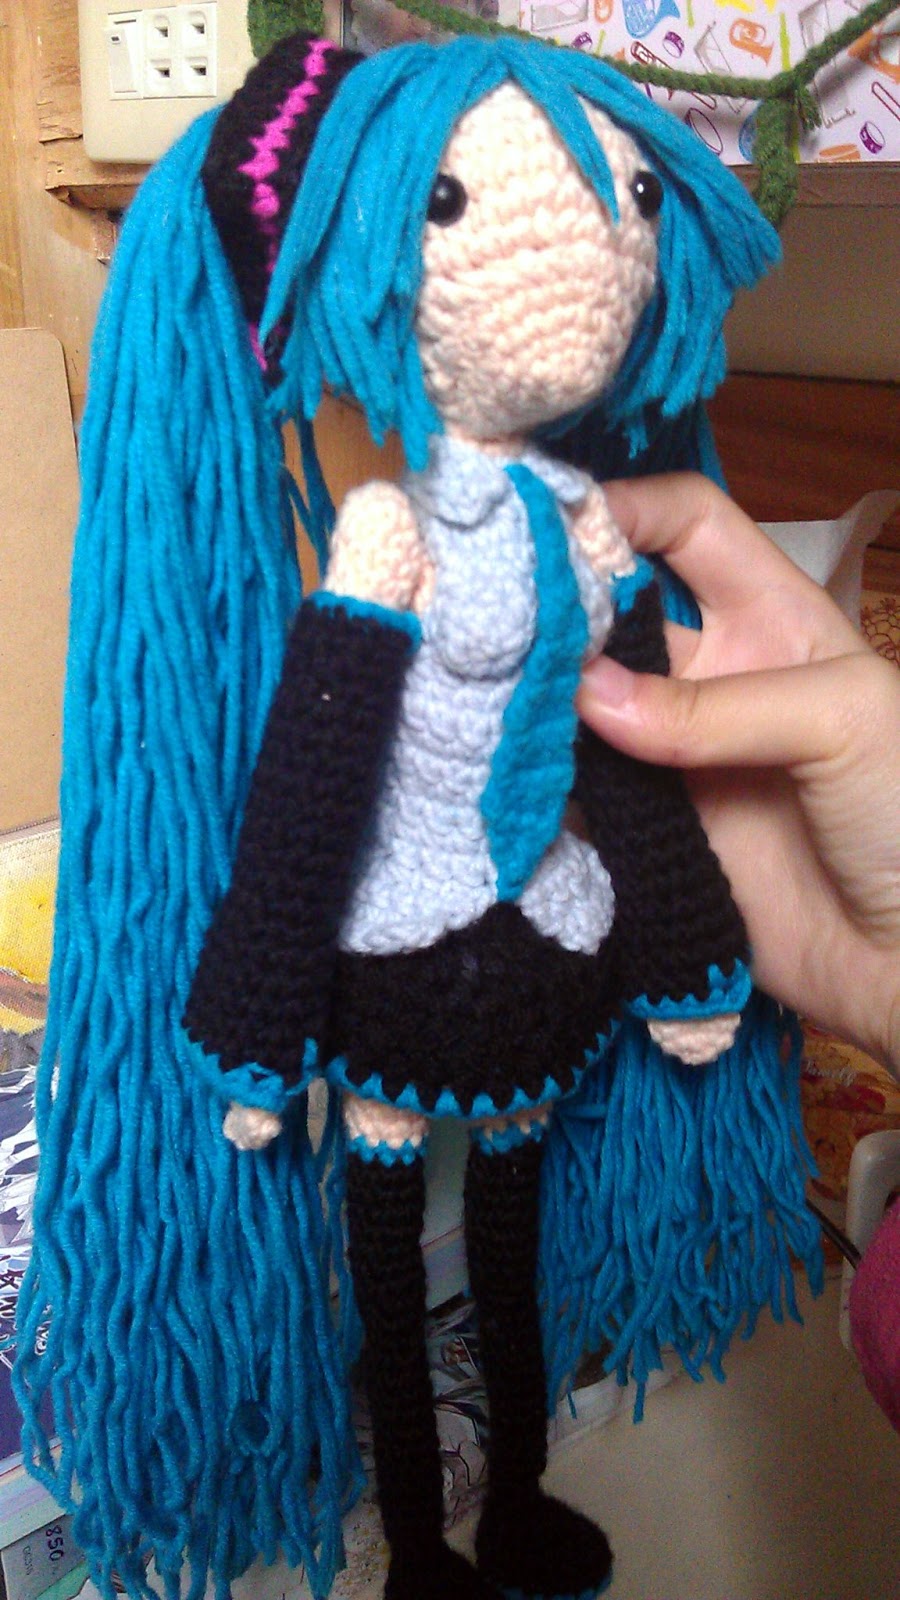
This is perhaps the tallest amigurumi I have ever made to date (Well, proportionately at least, as I'd made a 1:1 sized I-Pin from Katekyo Hitman Reborn in high school). The amigurumi is mostly based on this picture.
Here is a less-than-perfect pattern for this amigurumi. I improvised on parts and didn't always jot down stitch counts right away, so there might be minor errors here and there, hopefully not too much so that it'll come out wrong.
Pattern
Abbreviations:
sc- single crochet
hdc- half-double crochet
dc- crochet
sc2tog- single crochet two together
Materials:
worsted weight yarn (I used 50g skeins) skin*2, black*2, white*1, gray*1, sea-foam green*2, hot pink *1
8mm eyes
stuffing
22~24 gauge wire
2.5mm hook
yarn needle
Head (skin color)
Rnd 1: 6 sc in magic ring (6)
Rnd 2: 2 sc in every sc around (12)
Rnd 3: *sc in next sc, 2sc in next sc* repeat around (18)
Rnd 4: *sc in next 2 sc, 2sc in next sc* repeat around (24)
Rnd 5: *sc in next 3 sc, 2sc in next sc* repeat around (30)
Rnd 6: sc around (30)
Rnd 7: *sc in next 4 sc, 2sc in next sc* repeat around (36)
Rnd 8&9: sc around (36)
Rnd 10: *sc in next 4 sc, sc2tog* repeat around (30)
Rnd 11: sc around (30)
Rnd 12: *sc in next 3 sc, sc2tog* repeat around (24)
Rnd 13: *sc in next 2 sc, sc2tog* repeat around (18)
Do NOT close the opening!
Eyes go between rounds 8&9
Chin
Rnd 1: 4 sc in magic ring (4)
Rnd 2: *sc in next sc, 2sc in next sc* repeat around (6)
Rnd 3: *sc in next 2 sc, 2sc in next sc* repeat around (8)
Rnd 4: *sc in next sc, 2sc in next sc* repeat around (12)
Rnd 5: *sc in next sc, 2 sc in next sc* repeat around (18)
Rnd 6: *sc in next 2 sc, 2sc in next sc* repeat around (24)
Bind off and sew to the (stuffed) head, with the top edge between rounds 10 and 11 of the head). I strongly suggest pinning it and adjusting until you are happy with how it looks before sewing it down.
Here are some photos of how I did it (When I took this I actually forgot to put the eyes in. If you're using safety eyes, the eyes should already be in place):
When sewing, you'll want to make sure that your needle goes through the outer side of each sc, so that you're not left with a ring of stitches on the surface. Here's how mine looked after I finished sewing:
The bottom should now look something like this:
Sew the two edges up smoothly so you're left with 10 sc in a circle. Pick up from this and continue to work in rounds for the neck and on.
Neck& Torso (in skin color)
Rnd 1: *sc in next 3 sc,sc2tog * repeat around (8) (<<corrected now thanks to Noemi Martin =) )
Rnd 2: sc in each sc around (8)
Rnd 3&4: repeat rnd 2
Rnd 5: *sc in next sc, 2 sc in next sc* repeat around (12)
Rnd 6: *sc in next 2 sc, 2 sc in next sc* repeat around (16)
Rnd 7: *sc in next 3 sc, 2 sc in next sc* repeat around (20)
Rnd 8: sc in each sc around (20)
Rnds 9~12: repeat rnd 8
Rnd 13: *sc in next 3 sc, sc2tog* repeat around (16)
Rnd 14: sc in each sc around (16)
Rnd 15~19: repeat rnd 14
Rnd 20: *sc in next 3 sc, 2 sc in next sc* repeat around (20)
Rnd 21: *sc in next 4 sc, 2 sc in next sc* repeat around (24)
Rnd 22: sc in each sc around (24)
Rnd 23&24: repeat rnd 22
Stuff as you work along.
Okay, here comes the tricky bit. The legs are continued from the torso, so you do 12 sc in each sc to the center (where the legs meet), chain 3, slip stitch into the opposite sc, chain 3, slip stitch back, and sc in the remaining 12 sc. Sew up the gap between the two chain 3s. The result should be two rounds of 15 sc each. This is the top of the thighs.
Legs
Continue working with skin color. Stuff as you go along.
Rnd 1: *sc in next sc, sc2tog* repeat around (10)
Rnd 2: sc in each sc around (10)
Rnd 3~8: repeat rnd 2
Rnd 9: switch to sea-foam green, *sc in next 3 sc, sc2tog* repeat around (8)
Rnd 10: switch to black, sc in each sc around (8)
Rnd 11~18: repeat rnd 10 (8)
Rnd 19: *sc in next 2 sc, sc2tog* repeat around (6)
Rnd 20: *sc in the next 2 sc, 2 sc in the next sc* repeat around (8)
Rnd 21: sc in each sc around (8)
Rnd 22~29: repeat rnd 21 (8)
Rnd 30: *sc in the next 2 sc, sc2tog* repeat around (6)
Rnd 31: *sc in next sc, 2 sc in next sc* repeat around (9)
Repeat on the other leg.
Next up is the feet. Now this part is pretty vague for me because I pretty much went with my gut on the increasing and decreasing. Basically what you want to do is figure out where the front sc are (where the toes would be), and look at the 9 sc as 5 sc in the front and 4 in the back (heel). Now, sc in each sc until you reach the first 'front' sc. Here's what you do with the 5 'front' sc:
sc 1: 1 hdc, 1 dc
sc 2~4: 2 dc
sc 5: 1 dc, 1 hdc
Once that's done, sc in each remaining sc until you finish the round.
Next round is similar (I'm sooo sorry, but I've completely forgotten what I did here QAQ), sc until you get to the 'front' of the foot, do 1 hdc and 1 dc in the first 'front' sc, 1 dc in the next, 2 dc in the next, 1 dc in the next, and so on until the last 'front' sc, which is 1 dc, 1 hdc. Finish the round by doing 1 sc in each remaining sc. Repeat with other leg.
Bottom of the feet (make 2):
Rnd 1: In sea-foam green, chain 4, sc in 2nd chain from hook, sc in the next ch, 3 sc in the next ch, working on the back-loop, sc in the next ch, 2 sc in the next ch., slip stitch. (8)
Rnd 2: ch 1, *2 sc in next sc, sc in next sc* repeat to end, slip stitch (12)
Bind off and sew to the feet.
Arms (make 2):
Rnd 1: 6 sc in magic circle (6)
Rnd 2: sc in each sc around (6)
Rnd 3~19: repeat row 2 (6)
Rnd 20: sc in next 2 sc, sc2tog, sc in next 2 sc (5)
Rnd 21: sc in each sc around (5)
Rnd 22: 2 sc in each sc around (10)
Rnd 23: sc in each sc around (10)
Rnd 24: repeat row 24 (10)
Rnd 25: *sc in next 3 sc, sc2tog* repeat around (8)
Rnd 26: *sc in next 2 sc, sc2tog* repeat around (6)
Sleeves (make 2)
Rnd 1: In sea-foam green, chain 8, switch to black, sl st in first ch made to close the ring.
Rnd 2: sc in each ch (8)
Rnd 3~5: repeat round 2 (8)
Rnd: 6: *sc in next 3 sc, 2 sc in next sc* repeat around (10)
Rnd 7: sc in each sc (10)
Rnd 8~12: repeat round 7 (10)
Rnd 13: *sc in next 4 sc, 2 sc in next sc* repeat around (12)
Rnd 14: sc in each sc (12)
Rnd 15~18: repeat round 14 (12)
Rnd 19: switch to sea-foam green, sc in each sc (12)
Slide the sleeves up the arms and sew in place.
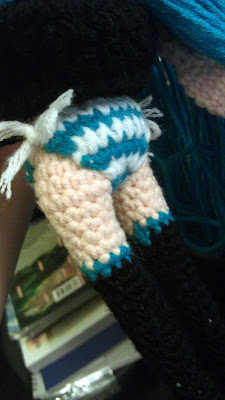
Panties:
Miku wears a very short skirt, so I decided to make her underwear as well. Her panties are most commonly said to be white and sea-foam green striped, so that's what I made.
Start with white, then alternate with sea-foam green with each row, carrying the previous color so there won't be lots of ends to weave in.
Row 1: chain 10, sc on 2nd ch from hook, sc across, turn (9)
Row 2: ch 1, sc across, turn (9)
Row 3: ch 1, sc2tog, sc across to last 2 sc, sc2tog, turn (7)
Row 4: repeat row 3 (5)
Row 5: repeat row 2 (3)
Row 6: ch 1, sc across, turn (3)
Row 7: repeat row 6 (3)
Row 8: ch 1, 2 sc in first sc, sc across to last sc, 2 sc in last sc, turn (5)
Row 9: repeat row 8 (7)
Row 10: repeat row 8 (9)
Row 11: repeat row 8 (11)
With row 1 facing front, put the panties in place and tie the sides together with white yarn.
The result should look like this:
Now it's time to dress her~
Shirt (back)
Row 1: In grey, chain 9, sc on 2nd ch from hook, sc across, turn (8)
Row 2: ch 1, sc across, turn (8)
Row 3: ch 1, sc2tog, sc across to last 2 sc, sc2tog, turn (6)
Row 4~5: ch 1, sc across, turn (6)
Row 6: ch 1, 2 sc, sc across to last sc, 2 sc, turn (8)
Row 7: repeat row 6 (10)
Row 8: ch 1, sc across, turn (10)
Row 9: repeat row 6 (12)
Row 10: ch 1, sc2tog, sc across to last 2 sc, sc2tog, turn (10)
Row 11: ch 1, sc across, turn (10)
Row 12: repeat row 10 (8)
Row 13~15: ch 1, sc across, turn (8)
Row 16: ch 1, 2 sc, sc across to last sc, 2 sc, turn (10)
Row 17: repeat row 16 (12)
Row 18: repeat row 16 (14)
Row 19: ch 1, sc across (14)
Bind off, leaving a tail for seaming.
Shirt (front)
Row 1~15: Same as the back of the shirt.
Row 16: ch 1, sc in next 3 sc, 2 sc in next sc, turn (5)
Row 17: ch 1, 2 sc in next sc, sc in next 2 sc, sc2tog, turn (5)
Row 18: ch 1, sc in next 4 sc, 2 sc in next sc, turn (6)
Row 19: ch 1, sc in next 6 sc (6)
Bind off and attach yarn to the 6th sc in row 15, and repeat rows 17~19
Pin shirt onto body and sew up the sides and top of the shoulder, leaving a gap between rows 3~8
Collar
Row 1: In gray, ch 11, sc on 2nd ch from hook, sc across, turn (10)
Row 2: ch 1, 2 sc on next sc, sc across to last sc, 2 sc, turn (12)
Bind off and sew in place, with row 1 on top.
Breasts (make 2)
Row 1: 5 sc in magic ring (5) Be sure to pull tight when making thiss round so that the stitch definitions are less noticeable.
Row 2: 2 sc in each sc around (10)
bind off and sew in place (with the top edge at roughly the 5th row of the front of shirt)
It's gonna look a bit weird, with the gap between her breasts, but you'll cover that gap up with the tie.
Tie
Row 1: In sea-foam green, ch 2, sc in 2nd ch from hook, turn (1)
Row 2: ch 1, sc in next sc, turn (1)
Row 3~5: repeat row 2 (1)
Row 6: ch 1, 2 sc in next sc, turn (2)
Row 7: ch 1, sc in next 2 sc, turn (2)
Row 8~9: repeat row 7
Row 10: ch 1, sc in next 2 sc, 2 sc in next sc, turn (3)
Row 11: ch 1, sc in next 3 sc, turn (3)
Row 12: ch 1, sc in next 3 sc. 2 sc in next sc, turn (4)
Row 13: ch 1, sc2tog, sc in next 2 sc, turn (3)
Row 14: ch 1, sc2tog, sc in next sc, turn (2)
Row 15: ch 1, sc2tog, turn (1)
Row 16: ch 1, sc in next sc
Bind off and sew in place
Hair
See this post
here.
Hair-ties (make 2)
Row 1: In black, ch 29, sc in 2nd ch from hook, sc across, turn
Row 2: In pink, ch 1, sc across, turn
Row 3: Switch to black. Cut a piece of wire approx. 4cm longer than your current piece. Sc across so that the wired is wrapped into the row. Bind off.
Fold the piece into a square, then sew the ends together. Twist the protruding wires together.
Slide the hair-ties up the pigtails, with the wire on the bottom (so that it's hidden by the pigtail). Push the wire into the head (ouch!) to secure.
Like I said, this is hardly a perfect pattern, so please leave a comment if you decide to try it out to let me know if there are any errors. Enjoy <3