12.25.2013

[DIY] Honey-Lemon Slices

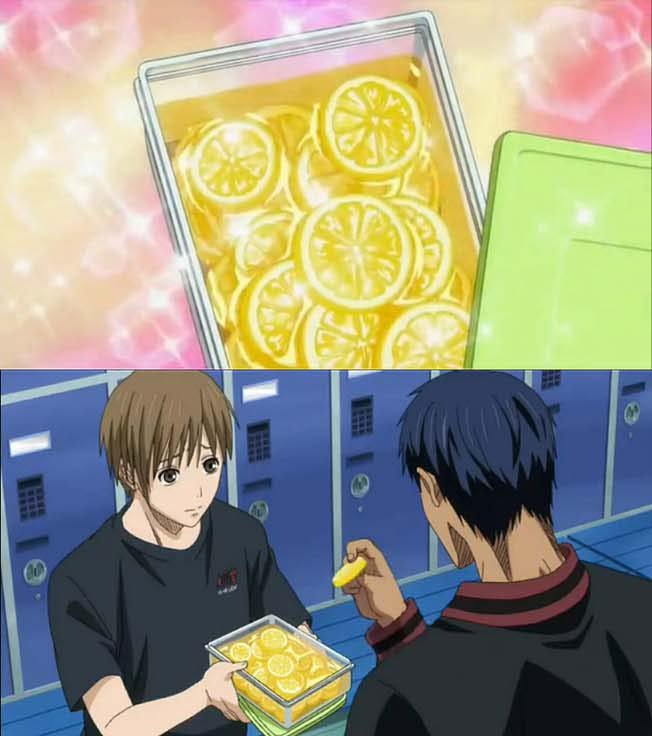
    I was watching Kuroko no Basuke last year and saw the episode where they had these honey-lemon slices after a game. I remember seeing it in Nodame Cantabile, and a number of shoujo mangas as well. It always look so delicious... when made correctly, of course. Somehow these lemon slices are usually a good indicator of whether or not a character is good at cooking.


Heaven vs Hell XDD

I can't say that I am a good cook, but I'm pretty sure I can manage to remember to slice the lemon first XD So last year I badgered my roommate Esther to make it with me. We made two batches in total, and I don't know if it's because we didn't leave it in the honey long enough or what, but the whole thing came out a bit bitter. It's still pretty good for making tea with, and the thinner slices tastes alright, but we weren't really wowed by the final product. 

Here's a photo of last year's batch. We actually did it with limes. This photo was taken before we sealed it.

This year I went shopping at the local grocery store and saw that they had beautiful looking lemons, so I bought some honey and attempted it again. This batch turned out marvelously.
It's starting to get cold here in Taipei, and I've been having cold symptoms all week. A few slices and a few spoonfuls of the honey in a cup of hot tea down and all my symptoms cleared up like I had imagined them!

To make some honey-lemon slices yourself, you'll need:


  • A jar or container that can be sealed airtight. 
  • lemons (as much as you like)
  • honey (as much as you need to cover all the lemons you're using)
  • salt


So here's what you do:


  1. With salt, scrub the outside of the lemon. The idea is to get the bitter oil out from the peel.

  2. Slice lemon into thin slices and layer in container.

  3. Cover lemon slice with honey. Be sure to cover it thoroughly. I do this by placing one layer of lemon slices, cover with honey, place another layer, cover with honey, and so one.  If you're using a jar, don't fill it to the brink. The honey will absorb the moisture from the lemons, so if you fill the jar up it will overflow.

  4. Seal the container and leave for 3~5 days. You can leave it at room temperature or put it in the fridge. It takes longer in a refrigerator.


 This is what this batch looks like after 5 days.

It keeps for a long time, but I'm sure it won't take long for you to finish it =) I use up the honey really fast making tea.

My roommates really enjoyed it, and are now making some themselves. I'm thinking about making some in jars and sending them to my friends over winter vacation.

Been a bit busy lately so many things are currently on hold. I'll post a review of The Hobbit: Desolation of Smaug in the next few days.

Oh and lastly, Merry Christmas, everyone!

9.29.2013

Bioshock Infinite- Elizabeth Amigurumi Free Pattern

I'm not really much of a gamer. I sucked so bad at FPS games that I tend to die within 5 minutes of any kind of fight. So yeah.

I do however love to watch playthrough videos, so I can enjoy the storyline without being killed like, 5 times an hour.

So a few months back I finished watching the youtuber Cry's playthrough of Bioshock Infinite, I was completely hooked. I love the art, the story... basically everything. And this is one of the few games to reduce me to actual tears... ah but I won't spoil anything in case anyone reading this hasn't played (or in my case, watched) the game yet.

Anyway, I'm totally in love with Elizabeth in the game. Straight up there with Midna and Zelda on my list of favorite female characters! She's got personality, an amazing back story, and none of that whiny damsel in distress quality that annoys me to no end. Just recently, I've begun preparing my Elizabeth cosplay costume for a convention in Taipei in December!

How in the world can I not make an Elizabeth amigurumi with the amount of love I have for her? So, taking a break from my dear dwarfs, I went for it~ And as an added bonus, here's the free pattern =)


Okay, so here's the picture I used for reference. I used pretty much the same pattern for all my humanoid amigurumi's and Elizabeth is no different.

First, a photo spam~


Materials you'll need: yarn (blue, black, dsark brown, white, skin), 2.5mm (4/0) crochet hook, stuffing, 8mm eyes, yarn needle, stitch marker

Important!!!!!! Note: Parts of the pattern are incomplete. I redid some things while making this and didn't always note the changes down. Please go through the entire pattern before deciding whether to begin the project. Don't want people wasting good yarn. 
.
Head and Body

*Stuff as you go along.*

Rnd1: With skin color, ch 5, sc in sec. ch from hook, sc in next 2 ch, 2sc in next ch. In back loops, sc in next            3 ch, 2sc in next ch. (10 sc)

Rnd 2: 2sc in next sc, sc in next 2 sc, 2sc in next sc, sc in next sc, 2sc in next sc, sc in next 2 sc, 2sc in next              sc, sc in next sc. (14 sc)

Rnd 3: Sc in next sc, 2sc in next sc, sc in next 3 sc, 2sc in next sc, sc in next sc, 2sc in next sc, sc in next 4                sc, 2sc  in next sc, sc in next sc (18 sc)

Rnd 4: Sc in next 3 sc, 2sc in next sc, sc in next 4 sc, 2sc in next sc, sc in next 3 sc, 2sc in next sc, sc in next 4 sc, 2sc in next sc. (22 sc)

Rnd 5&6: Keep increasing in each corner (increase 4 stitchs in each round) until stitch count is 30. (30sc)

Rnd 7: *sc in next 4 sc, 2sc in next sc* repeat to end. * (36 sc)

Rnd 8~11: sc all around (36 sc)

Rnd 12: sc in next 16 sc, sc2tog, *sc in next 4 sc, sc2tog* twice, sc in next 6 sc (33sc)

Rnd 13: repeat row 12 (30 sc)

Rnd 14: *sc in next 3 sc, sc2tog* 6 times (24sc)

It's a good idea to put in the eyes now. I put mine between rows 7 and 8, about 5 stitches apart.

Rnd 15: *sc in next 2 sc, sc2tog* 6 times (18sc)

Row 16: *sc in next 4 sc, sc2tog* 3 times (15sc)

Rnd 17: *sc in next 3 sc, sc2tog* 3 times (12sc)

Rnd 18: *sc in next sc, sc2tog* 4 times (8sc)

Rnd 19~21: sc all around (8sc)

Rnd 22: *sc in next sc, 2sc in next sc* (12sc)

Rnd 23: *sc in next 3 sc, 2sc in next sc* 3 times (15sc)

Rnd  24: *sc in next 4 sc, 2sc in next sc* 3 times (18sc)

Rnd 25: *sc in next 2 sc, 2sc in next sc* 6 times (24 sc)

Rnd 26: *sc in next 5 sc, 2 sc in next sc* 4 times (28sc)

Now, it's time to start on the breasts. Because you might have put the eyes in a slightly different place than mine, I'm just going to explain how the next round goes instead of giving specific stitch counts.

Rnd 27: First, you're going to figure out where the point between her breasts are going to be. Find the point between the eyes and trace down to find the center stitch. Mark it with a stitch marker (I don't have one handy so I improvised with a paperclip). Count 4 stitches on either side of the marked stitch. Sc until you reach the 4 stitches, then crochet the following: *2sc in next sc, 3sc in next 2 sc, 2 sc in next sc*. Sc on the marked stitch, then repeat from *to*. (40sc)

Rnd 28~29: sc all around (40sc)

Rnd 30: Switch to white, sc all around, but this time skip the center stitch. (39sc)


Rnd 31: Sc all around. (39sc)

Rnd 32: Count 10 stitches on each side of the center stitch. You will now be decreasing. Sc until you reach the 10 stitches, then crochet the following *sc in next sc, sc2tog four times, sc in next sc* twice. (31sc)

Rnd 33: Count 6 stitches on each side of the center stitch. Sc until you reach the 6 stitches, then crochet the following *sc in next sc, sc2tog twice, sc in next sc* twice. (27 sc)

Rnd 34: *Sc in next 7 sc, sc2tog in next sc* three times. (24 sc)

Rnd 35: * Sc in next 4 sc, sc2tog in next sc* 4 times. (20 sc)

Rnd 36~40: Sc all around. (20 sc)

Rnd 41: *Sc in next 4 sc, 2sc in next sc* 4 times. (24 sc)

Rnd 42: *Sc in next 7 sc, 2sc in next sc* 3 times. (27 sc)

Rnd 43: *sc in next 8 sc, 2sc in next sc* 3 times. (30 sc)

Rnd 44: sc all around (30sc)

Rnd 45: sc all around. (30 sc)

Rnd 46: in back loops only, *sc in next 8 sc, sc2tog* 3 times. (27sc)

Legs (continue from body)

Rnd 47~48: sc all around. (27sc)

Find the center stitches again (this time we'll need to note the one on the back as well), and mark them with stitch markers.


Rnd 49: sc to the marked stitch, ch 2, sc on second marked stitch, sc on the 2 ch towards the first marked stitch. Continue the round until you reach the second marked stitch.

You'll be working with legs separately from now on. For the second leg, sc along the back loops of the 2 ch made in round 49. Each leg should start with roughly 16 sts around, adjust by sc2tog or 2sc if necessary.

Legs (separate)

Rnd 1: sc all around (16sc)

Rnd 2: * sc in next 2 sc, sc2tog in next sc* 4 times (12sc)

Rnd 3~11: sc all around (12 sc)

Rnd 12: *sc in next sc, sc2tog* 4 times (8sc)

Rnd 13~21: sc all around (8sc)

Rnd 22: *sc in next 2 sc, sc2tog* twice (6sc)

Rnd 23: sc all round (6sc)

Skirt

Rnd 1: sc around the front loop of round 45 of the body. (30sc)

Rnd 2: *sc in next 4 sc, 2 sc in next sc* 6 times (36sc)

Rnd 3: *sc in next 5 sc, 2 sc in next sc* 6 times (42sc)

Rnd 4~23: sc all around (42sc)

Rnd 24: In front loops only, sc all around (42 sc)

Rnd 25: sc all around (42sc)

Rnd 26: In white, sc all around in back loops of rnd 23 (42sc)

Bolero (front, make two)

Row 1: ch 4, sc in 2nd ch from hook, sc through the row. (3 sc)

Row 2: ch to the end. (3 sc)

Row 3: ch in next 3 sc, 2sc in next sc (4 sc)

Row 4: ch to the end. (4 sc)

Row 5: ch in the next 4 sc, 2sc in next sc (5 sc)

Row 6~8: ch to the end (5 sc)

Row 9: ch in the next 5 sc, 2sc in the next sc (6 sc)

Row 10~12: ch to the end (6 sc)

Bolero (back)

Row 1: ch 13, sc in second ch from hook, sc to the end (12 sc)
Row 2: sc to the end. (12 sc)
Row 3: 2sc in first sc, sc to the last sc, 2sc in last sc. (14 sc)
Row 4~12: sc to the end. (14 sc)

Now sew the front pieces to the back to complete the Bolero, leaving a gap in the space where the arms would go.

Arms (make two)

Rnd 1: Make magic circle of 6 scs. (6 sc)

Rnd 2: *sc in next 2 sc, 2 sc in next sc* twice (8 sc)

Rnd 3~16: sc all around (8sc)

Rnd 17: *sc in next 2 sc, sc2tog in next sc* twice (6 sc)

Rnd 18: switch to white, sc all around (6 sc)

Rnd 19: *sc in next 2 sc, 2sc in next sc* twice (8sc)

Rnd 20: *sc in next 3 sc, 2sc in next sc* twice (10sc)

Rnd 21: sc all around (10 sc)

Fold white part up.

Hands (make two)

Rnd 1: ch 4, sc in 2nd ch from hook, sc in next ch, 2sc in next ch. In back loops, sc in next 2 sc, 2 sc in next sc (8 sc)

Rnd 2: *sc in next 3 sc, 2sc in next sc* twice (10 sc)

Rnd 3~4: sc all around (10 sc)

Rnd 5: *sc in next 3 sc, sc2tog in next sc* twice (8 sc)

Rnd 6: *sc in next 2 sc, sc2tog in next sc* twice (6 sc)

Sew to arms.

Boots (make two)

Rnd 1: ch 4, sc in 2nd ch from hook, sc in next ch, 2sc in next ch. In back loops, sc in next 2 sc, 2 sc in next sc (8 sc)

Rnd 2:  2 sc in next sc, sc in next 2 sc, 2sc in next 2 sc, sc in next 2 sc, 2sc in last sc (12 sc)

Rnd 3~4: sc all around (12 sc)

Now's the part I failed to take note of. Basically I did sc for the top of the boots (6 sc), then an hdc, then 4 dcs, and an hdc. I repeated this for around 3 more rows, sometimes decreasing where the hdc should be and increasing immediately after to make up for stitch count. I did a few more rows after that, to where I think the ankles might be, then sc around to the center point in the front of the boot, turn, sc around again to the center, turn, and continue as so for a few more rows.

Hair

Find where you want the hair to be parted. With dark brown (should be darker than what I used >  <) knot 2 rows along that line, each parted a different way, and contine knotting rows under that. It's best to do just enough rows so that the scalp is not exposed. Too many rows can make the hair to poufy. I glue a layer of  hair to the scalp so that she won't go bald every time someone holds her upside down.


Diagram of how I knotted the hair on. Red lines represent starting rows. 

How I knot the hair on is in this post: http://crochetfangirl.blogspot.tw/2013/02/amigurumi-hair-tutorial-pigtails.html

I did a row and a half of scs in skin color on her face as the nose, I don't have it written down exactly what I did, but this is competely optional and not hard to figure out.

Now embroider the black lines onto the corset, and her necklace (I did mine in white), style her hair a bit, and voila!


My Elizabeth now stays happily with my friend (he'll probably want to stay unnamed XD), who refers to her as his daughter, and promises to take her to Paris one day 。◕‿◕。
8.29.2013

The Hobbit- Kili Amigurumi

After I've made Fili, it's time for his brother to join him! Kili is one of my favorite dwarfs in the Hobbit. Fili and Kili remind me of Fred and George in Harry Potter. They're always so full of energy, always making all sorts of mischief, and in general always so perfectly lovable.

reference photo


I was a bit nervous about his beard- how am I ever going to do that with embroidery without messing up his face? (I am not so confident in the embroidery department) I decided to tackle this with the method the Craftster user queenofcrows suggested to me, felting the beard on with shredded yarn and a felting needle.

I've also run into some trouble with colors. Like I mentioned in the last post, all the dwarfs require shades of brown, but the yarn I'm using has four to five shades of brown, and not one of the dark enough for Kili's hair. So to compromise and distinguish from other dwarfs, I used black for Kili's hair.

I'd put off finishing Kili for awhile while I rushed up to Taipei for a convention, so I had half of him lying helplessly on my desk for over a week XD

Kili about to get his beard and mustache felted on.

Shredding the yarn was slow work, but I had fun picking everything apart over an episode of Hannibal or two. I used a jar I had at my disposal to hold the shredded fibers. I only shredded a bit, and it was way more than I needed. I'm saving the leftovers for Thorin. 

It was my first time handling a felting needle, so I was a bit nervous about plunging it into Kili's face right away. I had to pull the fibers out a few times, but eventually it turned out the way I liked.

And here he is~ 


I'm not quite sure about his hair, but I decided to tie it up in the back. Seems to look better from the front that way =)
Details in the front. I think I ended up with a bit too much blue... meh O__o

Kili, at your service!

I don't think I'm completely satisfied with how he looks. I'll be tweaking things here and there, I guess. I'll put an edge of fur along the sleeves and hem of the coat. Do leave a comment and give some suggestions =)

If all goes well, next up will be Gloin and Oin~

One Hobbit, 4 dwarfs down, 9 dwarfs, one wizard to go!!


8.13.2013

The Hobbit- Fili Amigurumi

First of the dwarf princes! I love Fili, but one look at his hair and beard gave me a headache. All those braids! But I can't let the hair (and beard) style daunt me now, otherwise goodness, what ever shall I do once I start on Nori?

I'm using mostly Ex991, a Taiwan-made, 100% acrylic yarn that I find to be perfect for amigurumis. It comes in a variety of colors, but since the dwarfs all have color palettes of earthy tones, I'm finding it difficult to get enough shades of brown. As a result, I compromised some of the color differences in the clothes, and changed the color of the boots.

Here's Fili's head when I'm stitching the hair on:


He looked a bit like Lord Elrond at first!!! Everyone told me he looked more elf than dwarf. I seem to have a knack for ruining the honor of all dwarf-kind. I sincerely hope I woke wake up to all my dwarfs attempting to strangle me someday.

The Craftster user queenofcrows left me the wonderful suggestion of using felting needles to apply shredded yarn to make the beard and stubble. I don't have a felting needle with me though, so I went and embroidered. It worked out okay for Fili, but I'll definitely try the new method on Kili. (I've got the yarn all shredded and stored away for later use~).

Anyway, here he is after growing a beard, hopefully less elf-like:


Then I did a bunch of slacking off before finally finishing the rest of him after half a season of Hannibal. (Spectacularly creepy show that gave me goosebumps, by the way. Love it despite having trouble eating meat afterwards.) 


The furry yarn used for his coat sheds everywhere!! It drove me absolutely mad! I believe I inhaled some in the process. All things aside though, I love working with different yarn, and this one is no different =)

Next up is Kili! I've finished about half as of typing this post up, but I've run out of yarn so it'll be awhile. Oh, and I also need a felting needle XP

I haven't decided on where these dwarfs will go once they are finished. I know for sure that I don't want them separated from one another, and that I'll be taking them to the movie premieres. So until the trilogy ends, I won't be parting with them just yet! Then again this is just the third dwarf, so I still have a long way to go before deciding things like these.

1 hobbit, 3 dwarfs down, 10 dwarfs, 1 wizard to go!

7.15.2013

The Hobbit- Balin Amigurumi

So I'm basically making the lovely Hobbit characters in the order they came knocking on Bilbo's door. (Meaning Thorin will be last, which will serve as motivation to stick to the end XD) So after Dwalin is Balin, at your service.

I'm not sure if anyone else share my thoughts, but my first impression of Balin is Santa XDD I contemplated using a blend of white and gray for the hair, but decided to go for white in the end. It's less realistic but I find it really cute!

Here's the reference pic (though I mostly used pics in my handy movie guide ^^):


Caught a loose thread there XP *goes to fix it*

I used a metallic thread along with my run-of-the-mill black yarn for the edges of his clothes. Balin's outfit is extremely detailed, so I had to simplify it, but I also wanted something fancy =) 

I made the mistake of forgetting the fact that Balin wore gloves. That's what I get for not double-checking my sketches. (And I underlined 'black' too! Twice!) We'll just pretend he forgot about the gloves then.

At one point I had to get his beard out of the way to sew the collar on, and to do that I tied his beard up in a nice little bow, which I imagine is somewhat of an insult to any self-respecting dwarf. Sorry, Balin, had to be done XD I hereby apologize to all dwarf-kind!

Next up is Fili, who is already half-way there~

One Hobbit, two dwarfs down. 11 dwarfs, 1 wizard to go!

7.14.2013

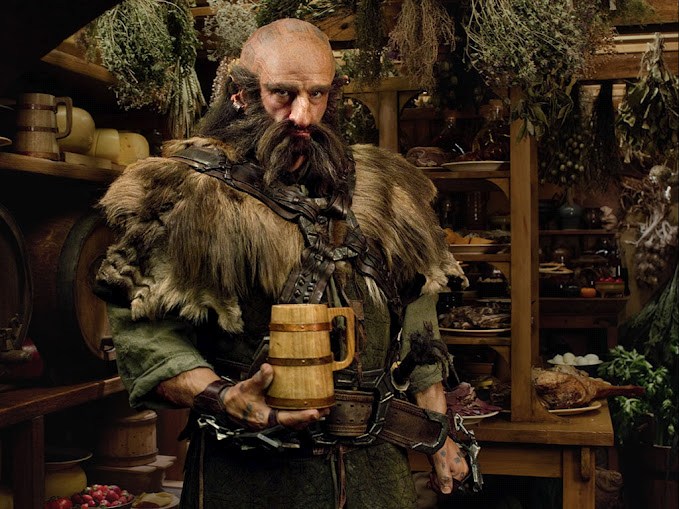
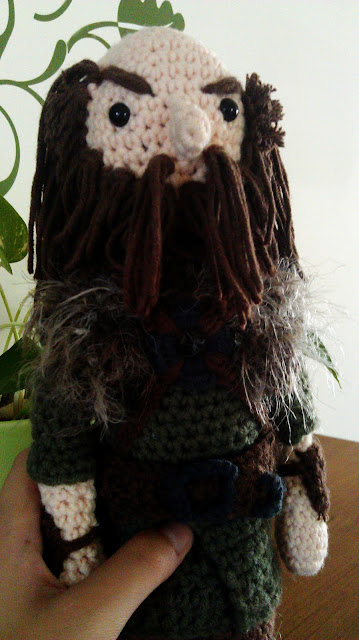
The Hobbit-- Dwalin Amigurumi

Goodness, I've had this in draft all this time and I'd failed to notice!

In the midst of the onslaught of reports and assignments and club activities and the anxiety from finals week approaching, I finished making Dwalin!

Funny thing is, though he's a dwarf, Dwalin is the tallest amigurumi I've made to date.

Reference photo =) 


Oops, he looks a bit disproportionate in this photo, doesn't he?


Detailing on the chest.
I had fun experimenting with the furry yarn used for the fur piece. I went looking for the yarn with my Hobbit Official Movie Guide and showed the lady there photographs of Dwalin. She thought I wanted to make an actual fur piece, and stared at me as though I'm crazy XD

He's a good deal taller than Bilbo, but Dwalin is one of the tallest dwarfs in the company, and I'm worried that Bilbo is going to end up taller than some of the dwarfs... hmm... Oh well, as long as Thorin is taller than Bilbo, it's fine with me XD (Bagginshield shipper revealed)

Oh, I almost forgot! I took Dwalin with me to my aunt's house, and my aunt posed him with her kitten~


I just ruined his manliness, didn't I? To all dwarven-kind I probably rank below elves now XD

Dwalin is actually finished long before this post. Like I said, I put it in draft and forgot about it *hides face*. So I'm actually already done with Balin, and Fili is coming together nicely.

For the sake of counting down though, we'll pretend I posted on time:

1 Hobbit and 1 dwarf down, 12 dwarfs, 1 wizard to go.

5.22.2013

Bilbo Baggins Amigurumi

It's done! My very own adorable gentle-hobbit. I tried something a bit different with this amigurimi. I added a nose and ears, which I never do in fear of messing everything up. I also made an attempt to shape the limbs a bit more instead of just making a tube... hope it shows XD

Anyway, here it is~


close-up of the clothes

Isn't he adorable!!!? I considered giving him eyebrows, but then again I don't want to fix him with a permanent expression. The yarn for his hair was already curly so it only took a bit of wax to get it just the way I wanted =)

1 hobbit and a dragon down, 13 dwarves and a wizard to go!

5.21.2013

Experiments- Koala's March Balls

I read a post on Plurk the other day that said that if you took a box of Lotte's Koala's March cookies, (The ones pictured below, if you've never had any before. If that's the case, I feel so bad for you because they're great XD) shake it for about 30 to 60 minutes, you'll end up with a chocolate (or whichever flavor you're working with) and crushed cookies ball.

It soon became a trend all over, to the point where the cookies were sold out in the nearest 7-11 when I tried to get a box! 

Anyway, naturally I decided to give it a try. After all, worst-case scenario is that I end up with chocolaty goo. Which doesn't sound all that bad, all things considered.

You can feel the koalas crushing and getting dismembered as you start to shake it. After awhile the contents inside start to feel a lot more solid.

And around 30 minutes (I don't know how long exactly, my arms got sore and I took a break), voila!


The moisture in the filling softened up the cookie, but it's still slightly crunchy.

And of course I couldn't stop there! So my dear roommate and I went and got the other flavors as well.


This is strawberry, it's a bit too sweet for me but it smells sooo nice! You can smell the strawberry even before you open the package!


Next is cream. It took a longer time than the others to shake into a ball. Esther assumes it's because of a higher protein content, but we're no scientists, and there are too many factors we couldn't account for, so we do the only thing we can do after dissecting it-- eat it up. Yum!